


One of the many projects I was able to create with the fun and adorable February Main kit from My Creative Scrapbook was this special Valentine gift set for my nieces Ella and Daphne which included Kisses-filled "Pillow Boxes".

You have undoubtedly seen the fancy punches and dies that enable you to create such pillow boxes. They are easy to use, but can be quite expensive.
I will show you today how to create your own pillow box from scratch.
First, cut your patterned paper into a 6" square.

Using your paper cutter and a scoring tool, score your paper vertically at 2 1/2 inches.

Moving 2 1/2 inches left (5 inches from the start of your paper square), score again. You will be left with a 1/2 inch tab at the end.

Put the scored square aside for now.
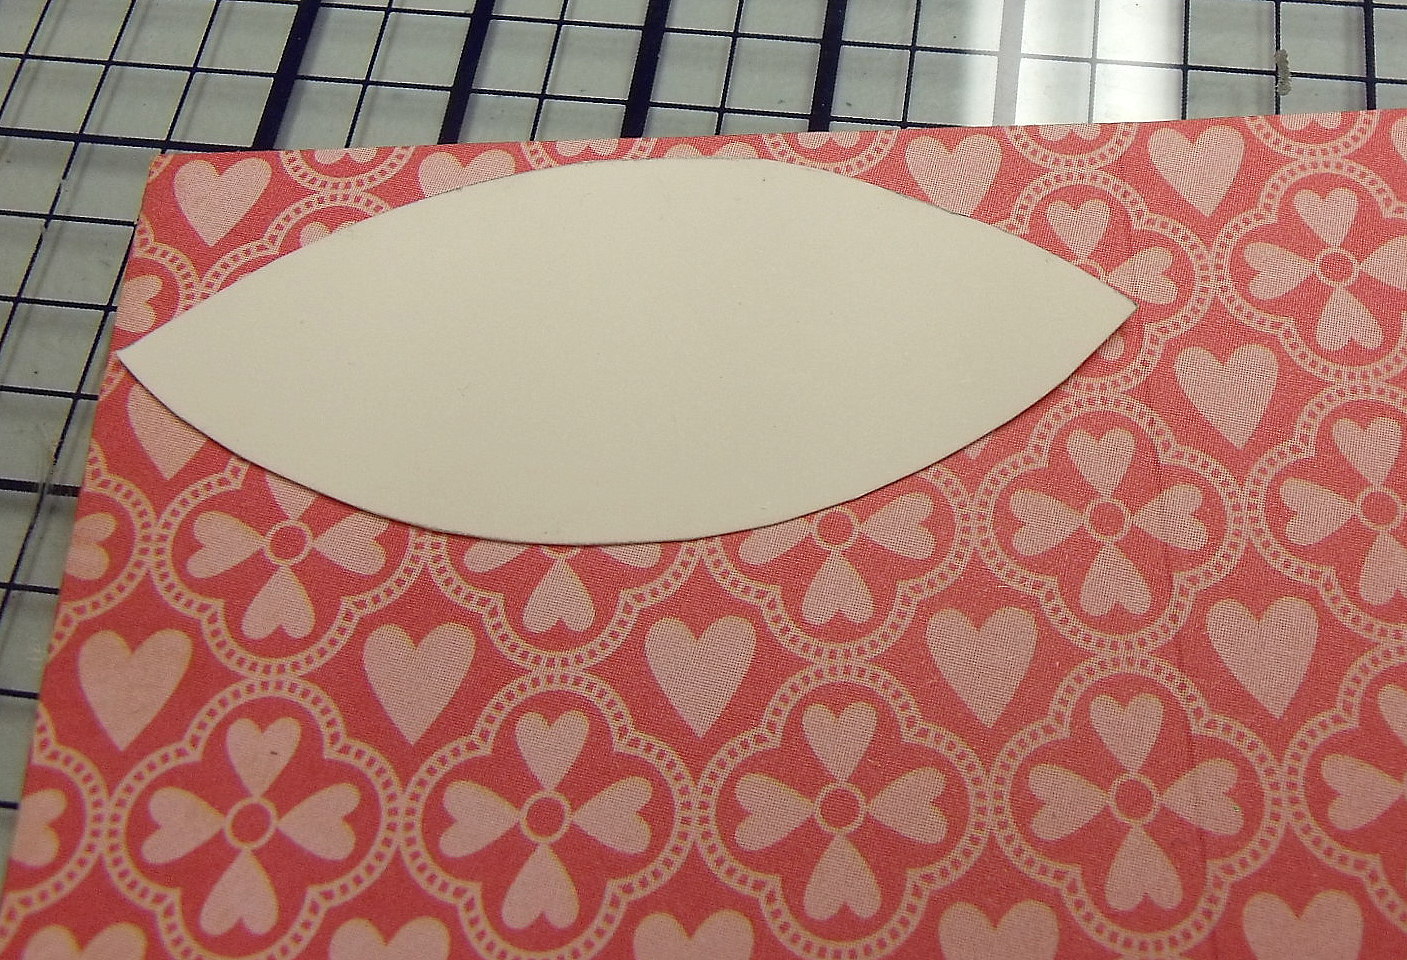
Cut a 2 1/2 inch by 1 inch rectangle out of sturdy cardstock. a

Use a 3 1/2 inch circle as a tracing tool (I used a circle die fitting that size), line it up against one half of the rectangle and trace the circle's outside edge with a pencil. Do the same on the other side.

Cut along the traced lines and your cardstock shape will end up looking like this.

Using the cardstock as template, line it up along the top edge of your patterned paper square in between the two scored lines. Trace with a pencil along the top curve of the template and score along the bottom curve. Repeat this in between the next 2 lines of your square and on the last smaller part.
When you cut along the penciled line, your edge will look like this. The last smaller part needs to be cut along the bottom curve.

Do the same along the bottom edge of the square.

Fold along all the scored vertical lines and crease.

Add glue on the small end piece. Fold the box unto itself, adhering the small tab behind the larger one.

Cut or punch (using small circle punch) thumb notches on each end.

Use your fingers to fold the curved score line, thumb notch tab down first. Insert candy and close the other end of your pillow box.

Then, all there is left to do is to decorate your box with stickers, ribbon, twine, flowers, sentiment, whatever your heart desires. :)
Visit My Creative Scrapbook to see their wonderful kits and daily inspiration from the DT!

No comments:
Post a Comment